

First, we stamp 3 petals with a lot of ink.

Then, with a less ink, stamp the petals around the first 3.

Tune the whole shape with even less ink. Flower part is now completed.

Let's show you how to add leaves next, without ruining the image of the flower we have just created.
In order to prevent the flower and the leaves from overlapping, you need to take some green ink off the
leaf stamp below.
We use Kleenex to take lower half of the ink off, by tapping motion. Don't wipe off.

Just stamp around the flower. You can see how the green ink fades off and don't overlap with the flower image, can't you?

This is an easy, but useful technique!

 and wanted to personalize it by adding her and her husband name plus cheese (because they love wines and her husband likes cheese, she said). I had to re-position the wine bottle and glass to balance the whole design when names and cheese are added.
  Including cheese in the design worked pretty good to fill the empty space below the names.
 Making a pad with the Kleenex ball and a peace of Kleenex.
 Wetting the pad and taking some ink off the stamp by tapping motions.
  This is how the image looks like.
  Cleaning the stamp with wet paper towel.
  I tried with lighter ink to show more transparency of the glass bowl,
  but the impression was too weak.
  So, I added darker ink to the top and bottom of the stamp.
 Added a goldfish in the bowl.


 Pretty simple!
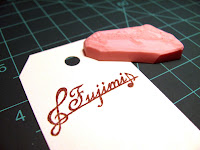 Whole stamp carving process is mostly fun, but creating a new design is sometimes frustrating. As the friend is a very good piano player, the theme of the design came up pretty quick. I drew some designs on the paper to visualize what's in my head; the name surrounded by some notes. However, they didn’t look pretty at all. I kept drawing and drawing and when I almost gave up, I finally ended up with this design.
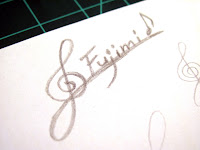 I changed the font and the position of the note. This is how the completed stamp looks like.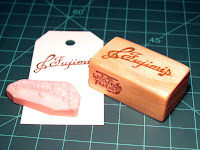


 This character is from the movie “Tim Burton's The Nightmare Before Christmas” released in 1993, a year before we came to the US. We didn’t know what Halloween was at that time, which was exactly like the main character in the movie “Jack Skellington” from Halloween town couldn’t figure out what Christmas was all about after visiting Christmas town accidentally. We were so fascinated by the movie when we watched it on video for the first time. The motion picture style was very eye catching, but what amazed us the most was that how rather a scary looking Sally looked more and more charming as the story progressed!

 The whole process of making this stamp, communicating with Michelle, was really fun. She wanted to use this stamp for her wedding programs. The size of the design is 1 ½” x 3 ½’.
  Our stamps are usually smaller as we want them to be versatile. So, this became the largest of all stamps we have made. Wood block was dyed and distressed as the plane wood block looked to simple for the size. We hope she likes it.
  We are glad to be able to take part in the creation of her wedding programs.
 This cute design only measured ¾” x ¾” and some part of it was very detailed. I could have made the design a little larger to make it easier to carve but I decided to use the original size. The bigger size didn’t look as cute as the original one.
 The other order was from Madoka. She wanted a personalized stamp of cosmos flower. I designed a single cosmos flower and added her name to it, but there was too much empty space between the flower and the name. I could have filled that space with leaves if it was a design that uses other flowers, but cosmos doesn’t have pretty leaves.
  So, I added one more cosmos instead.


 On the middle of the carving process.
 My shoulders are tight.
 Mounted the stamp on finished wood.
 We hope she likes the stamp and enjoys using it.
 It does not look nice but the stamped image has the taste we wanted.